

Configured parts let you consolidate many versions of a product into a single storefront listing, but until now every user saw every option. With the new Inclusion and Exclusion Tag support for child parts, you can decide which configurations each user is able to choose, all within the same parent part.
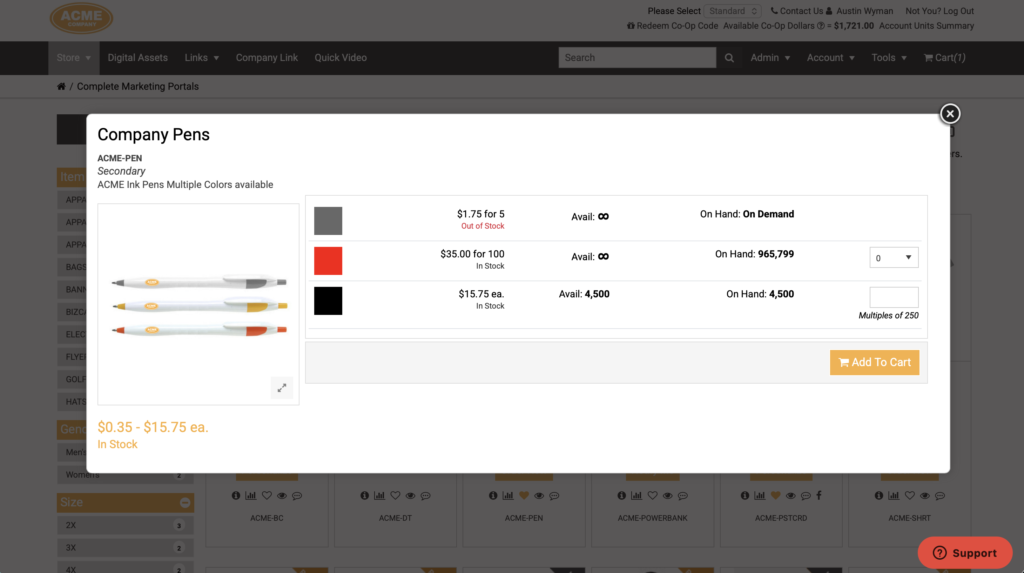
Say you have a pen with three configurations: black, red, and yellow. Add an inclusion tag to the child part for the yellow pen, and only users with that tag will see yellow as an option. Everyone else ordering the pen will see just black and red.
Benefits to You
- Serve every audience from one product. Keep a single parent part on the storefront while showing different configuration options to different users, instead of building and maintaining separate parts for each group.
- Restrict individual options, not whole products. Limit a specific size, color, or version to the users who should order it without hiding the rest of the product from them.
- Keep the storefront clean. Users only see the options that apply to them, which means fewer wrong orders and fewer questions to your support team.
- Reuse the tools you already know. Child parts use the same tags and the same Tag Manager as any other part, so there is nothing new to learn.
How It Works
Inclusion and exclusion tags follow the same rules on child parts as they do on any other part:
- A child part with an Inclusion Tag will ONLY be offered as an option to users with that same tag.
- A child part with an Exclusion Tag will NOT be offered as an option to users with that same tag.
Let’s use the pen example. Users on the Marketing team should be able to order the yellow pen, and everyone else should only see black and red.
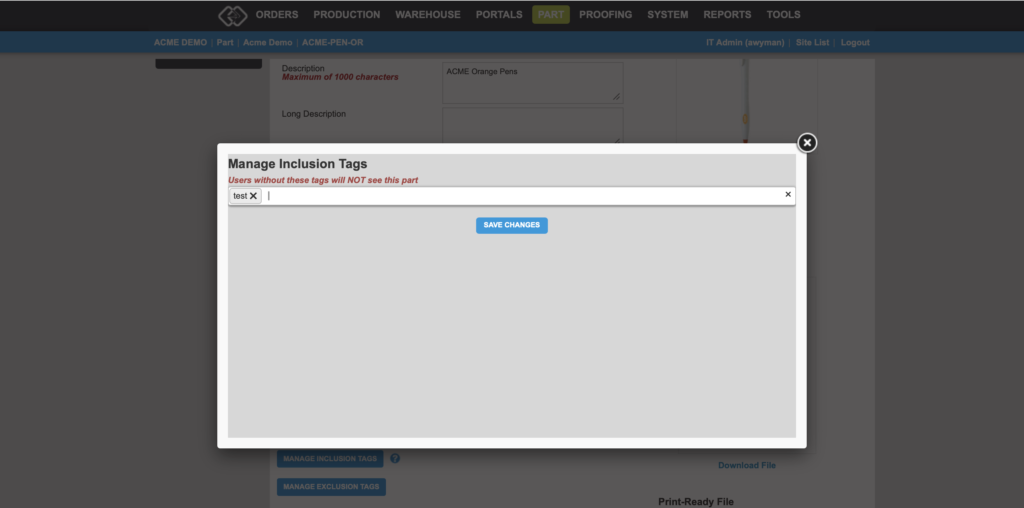
- Open the user details page for a Marketing team member in the back end and click Manage Inclusion Tags.
- Create a tag and click Save Changes.
- Go to the part page for the yellow pen child part and click Manage Inclusion Tags.
- Search for the tag you just created, select it, and click Save Changes.
- Repeat step 1 for any other users who should see the yellow option, or add them all at once from the Tag Manager (see below).
Now, when a tagged user orders the parent pen part, they will see black, red, gray, and yellow. Users without the tag will only see black, gray and red.
Managing tags in bulk with the Tag Manager
- Click Tag Manager in the menu of the customer details page.
- Find your tag in the list and click Details.
- Search for the users or parts you want to add and click Add.
Exclusion tags work the same way in reverse. To hide the yellow pen from a specific group, add an exclusion tag to the yellow child part and assign that tag to the users who should not see it.
Portal Admins can also create and assign tags to users and parts from the Admin / Parts and Users details pages in the portal.
Whether you are limiting a premium finish to certain branches, offering region-specific versions of a document, or keeping a discontinued color available only to select users, tags on child parts give you precise control without adding to your part count. Give it a try on one of your configured parts, and reach out to the Propago support team if you have any questions.
Want to learn more about configured parts and tags in Propago? Check out our previous Did You Know articles:
- Did You Know Configured Parts Can Be Used To Organize Your Clients’ Storefronts?
- Did You Know Inclusion And Exclusion Tags Can Be Used To Control Part Viewing Rights?
If you have any questions or need support, you can contact our support team at: [email protected]
Find all of our Did You Knows here: Knowledge Library